Creating Policies
After 18th August 2024, this page would permanently be moved to a new location. You can access this page from a new URL which is present here. If you have saved or bookmarked the current URL, kindly update it with the new URL, since there will be no 301 redirect from the current URL to the new URL.
Policies allow customers to create templates for their most common workflows by unifying a set of Detection Rules with the actions to-be-taken when those rules are triggered, including:
- automated actions such as redaction of findings
- alerting through webhooks
Once defined, a Policy may be used in requests to the Nightfall API, such as calls to scan file uploads, though automated redactions are not available for uploaded files at this time.
To create a Policy, navigate to the Developer Platform landing page in the Nightfall Dashboard, then click the Policies tab.
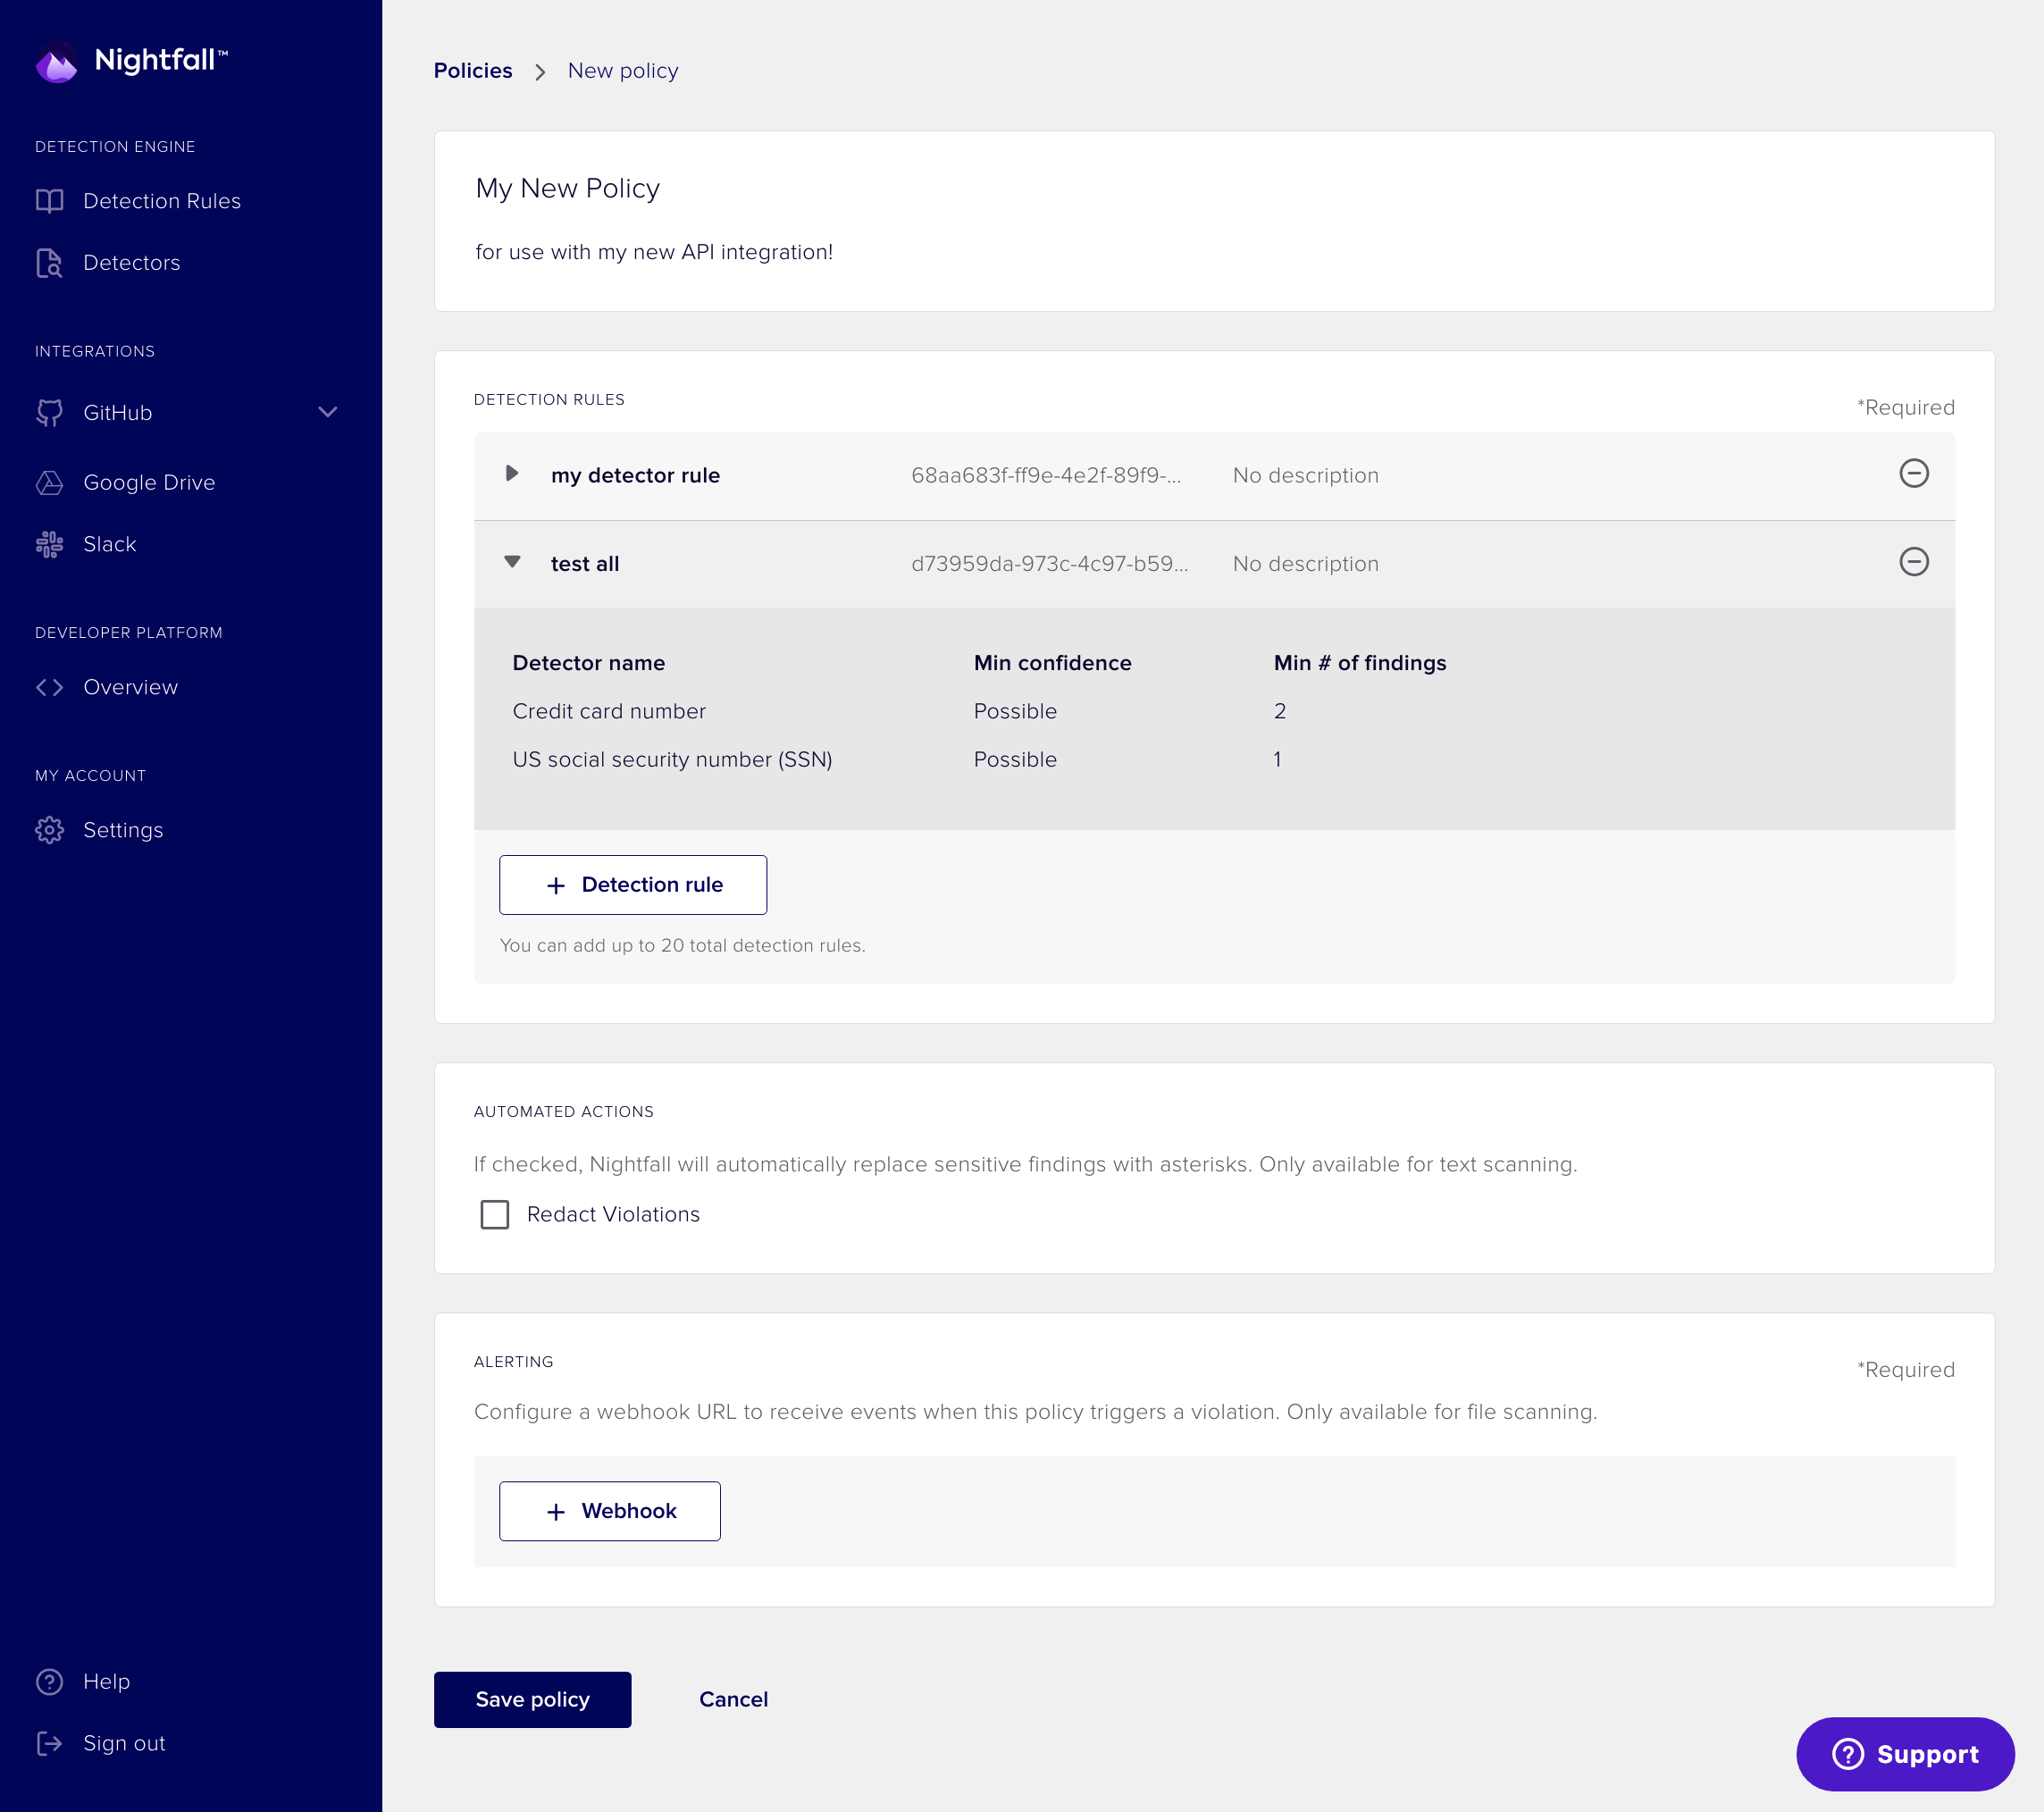
This page displays a list of all active Policies for the Developer Platform. Click the "+ New Policy" button in the upper right-hand corner to create a new policy, and you should see a page like the image below.

Provide a display name for your Policy as well as an optional description.
Add one or more Detection Rules that you have previously defined (up to 20).
Indicate whether or not you want to redact violations by checking the "Redact Violations" checkbox.
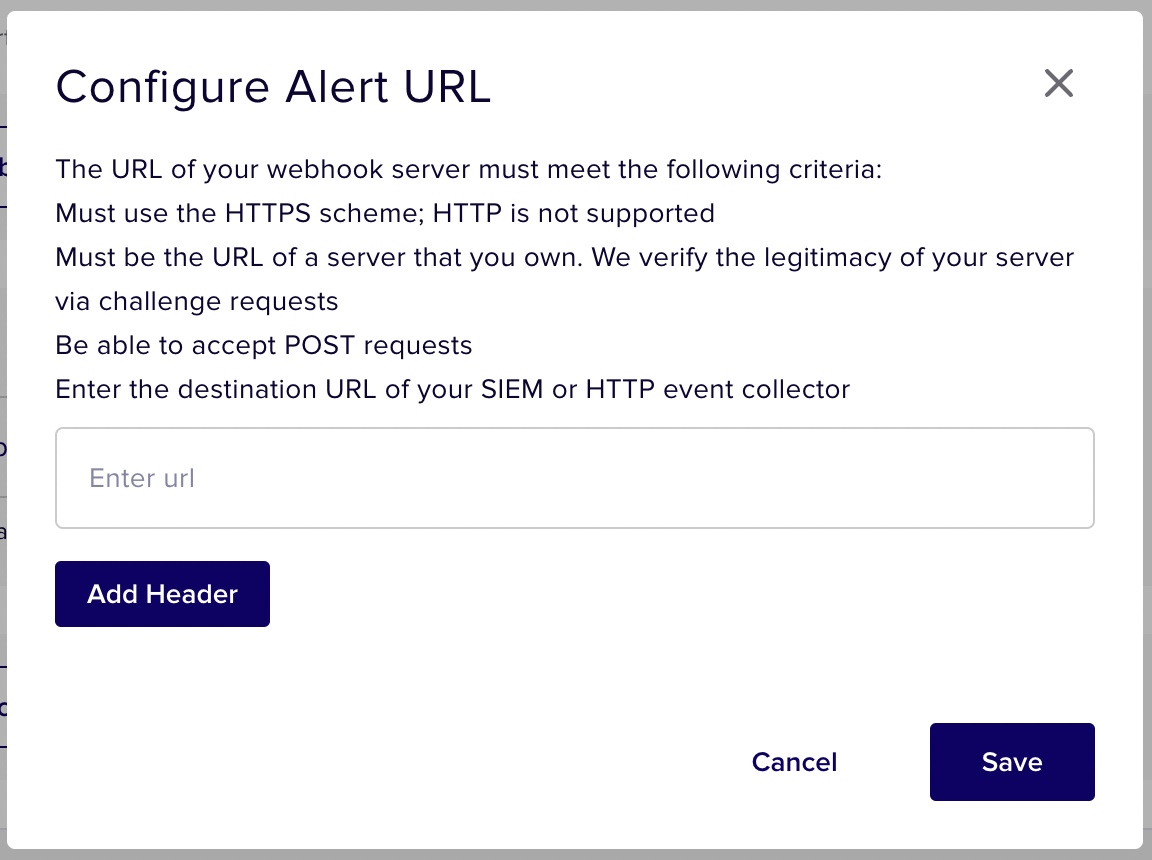
To configure alerting, add a Webhook URL that will receive events when the Detection Rules are triggered. See more about Nightfall's requirements for Webhook Servers here.

Configuring a Webhook URL
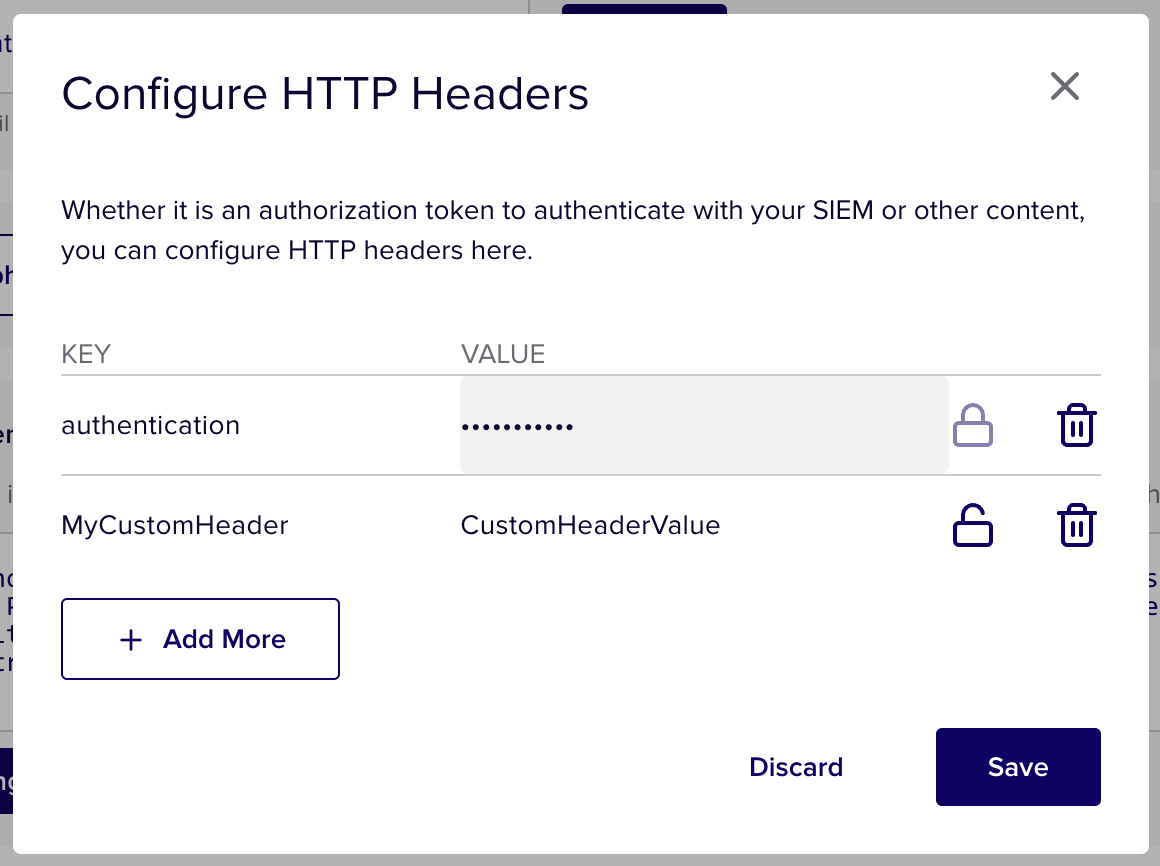
If you have custom headers you would like to add to requests sent to the Webhook URL, you can do this from the overlay that appears when you click the "+ Webhook" button on the policy creation and edit page. These headers may be used for the purpose of authentication as well as integrating with Security Incidents and Event Management (SIEMs) or similar tools that aggregate content through HTTP event collection.
Click the "Add Header" button to add your custom headers.

Once your header key and value is entered you may obfuscate it by clicking on the "lock" icon next to the value field for the header. Click the "Save" button to persist your changes to the headers.
When you have completed configuring your Webhook URL and Headers, click the "Save" button.
Limits On Webhook Headers
It is currently not possible to configure headers for webhooks programmatically when defining policies through the API.
After you click the "Save Policy" button, your policy should be immediately available for use. You can refer to the API Docs for the comprehensive list of endpoints that support policy UUIDs.
Updated 5 months ago
